As a Karaoke enthusiast, I am fortunate to belong to an on-line community of music-loving friends who enjoy each other’s music, and provide an encouraging environment to all. We all agree that a good quality recording can really support and boost a singing performance. Sound recording in the past used to be a complex endeavor attempted by experienced sound engineer with expensive audio equipment in professional sound studio setup. Over time, revolution in digital audio technology reduced the equipment required significantly, and made it affordable for anyone to do it at home with a computer and Digital Audio Workstation (DAW) software. However, it remains a very technical job that needs skill and practice. Some time back I wrote a post “My Recipe for Home Recordings" to serve as a step-by-step guide for sound recordings at home. However, most singers find it too complex to use a Digital Audio Workstation on a computer for recording and mixing. We need an easier alternative that a singer can use to record his Karaoke performance easily.
You may have tried playing the Karaoke music track, singing along the music, and recording the performance on your mobile phone. It is an easy method, but you may not be happy with the resulting sound mix quality for several reasons:
Step 1: Set up the Recording App
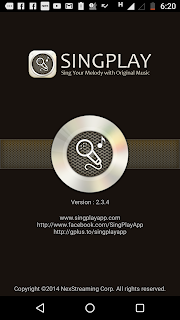
We will use the SingPlay app from NexStreaming Corp for this exercise. As a first step, download and install the SingPlay app on your mobile, start it, and check that you get the screen shown here.
Step 2: Select the Karaoke Music Track
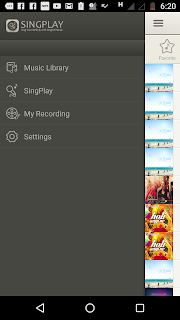
Make sure that the Karaoke music track for your performance is in the music library on your mobile. From the menu of SingPlay, select the first item – Music Library, and it will display all the songs in your music library.
Now, Locate your Karaoke music track in the list, and tap it. It will start playing and two buttons will be displayed on the right.
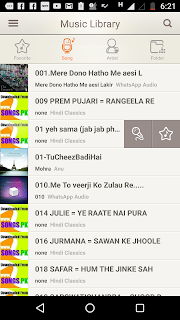
Tap the mic button to load this selected track in SingPlay for your performance. It will take you to the SingPlay recording page and the track will start playing.
Step 3: Set up for Recording
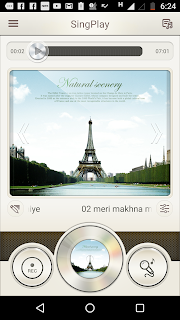 The SingPlay recording page has four buttons at the bottom. The CD image (center button) button is to control playback and pause. The mic button (on the right) is to switch Karaoke mode on or off. The Karaoke mode is used to reduce the original vocals from the song. Since we are using a Karaoke music track for our recording, tap this button once to turn off the Karaoke mode. It should make the music sound louder and clearer.
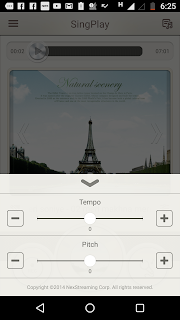 Now, tap Control button (above mic button) and a Control Panel will be displayed. Use it to adjust the tempo and pitch of the music track. Come back to the main page and listen to the music now. Repeat the steps till you reach a tempo and pitch which is comfortable for your singing.
Connect a headphone or a hands free kit to your phone. This is because while singing, you want to hear the music in your earphone to ensure a clean recording of your vocals. Now, play the track and practice singing with it till you get it right.
You are ready to start recording now.
Step 4: Record Your Performance
 Tap REC button, recording will start after a short countdown, with the music track playing in your ear. Sing along the track.
It is better not to hold the phone in hand while recording, but keep on a table to avoid noise. Make sure you are in a quiet room, with not too much noise.
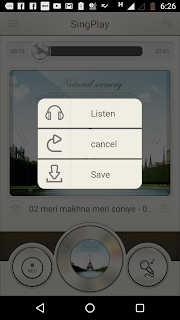
When you are done with singing the song, tap REC button to stop recording. You will get three buttons on the screen. If you are not happy with the performance, tap Cancel button, and do the recording again. When you are satisfied, tap Listen button to save and listen to the recording.
Step 5: Adjust the Mix
 When you are listening to your recording, you can adjust the mix to make it sound better. Tap the Control button on bottom right to open a mixer panel that has four controls.
Music Volume – slide this control to adjust the volume of background music. If music sounds too loud or the vocals sound too soft, lower the music volume.
Vocal Volume - slide this control to adjust the volume of your vocals so that it sounds good with music.
Reverb Volume – slide this control to make your vocals sound more spacious. Its range is from 0-6, a value between 2 and 4 will give you good results.
Music Delay (Sync) – slide this control if you feel that the timing of music and vocals are not matching perfectly. If not sure, leave this setting unchanged.
After every change, listen to the mix again. It is easy to do, but the quality of the final mix depends on how carefully you listen to different sounds in the mix. Do it repeatedly till you get the recorded mix to right.
Step 6: Render the Mix as an Audio File

Finally, you are ready to render your performance. Tap the export button, and your recording will be saved in your music library. That’s it – you are done with your Karaoke performance recording and mixing. If you want to create a video for sharing on Youtube, tap the Share button and save the performance as a video in your photo album.
I will leave you with an example recording that I created using the above steps in SingPlay. Have fun recording your performance!
Read next post in the series - Novice in the Wonderland – Live Recordings at Sur Swaranjali
You may have tried playing the Karaoke music track, singing along the music, and recording the performance on your mobile phone. It is an easy method, but you may not be happy with the resulting sound mix quality for several reasons:
- You have no control on tempo and pitch of the Karaoke track
- There may be too much of background noise in the recording.
- The music may be too loud, drowning the vocals in it.
- Or the music may be too soft, sounding distant and remote.
- The voice may be sounding too flat and one dimensional.
- Record your vocals with a Karaoke music track with little background noise
- Have a way to adjust the tempo and pitch of Karaoke music for your singing comfort, like you do in a karaoke performance
- Adjust the volume of music and vocals to get the right mix that sounds good
- Add reverb to the vocals, and adjust the level of reverb so that it sounds spacious
- Adjust any delay between the music and vocals to get it in sync
- Finally, mix everything and produce an mp3 of the mix to share.

Step 1: Set up the Recording App
We will use the SingPlay app from NexStreaming Corp for this exercise. As a first step, download and install the SingPlay app on your mobile, start it, and check that you get the screen shown here.

Step 2: Select the Karaoke Music Track
Make sure that the Karaoke music track for your performance is in the music library on your mobile. From the menu of SingPlay, select the first item – Music Library, and it will display all the songs in your music library.
Now, Locate your Karaoke music track in the list, and tap it. It will start playing and two buttons will be displayed on the right.

Tap the mic button to load this selected track in SingPlay for your performance. It will take you to the SingPlay recording page and the track will start playing.
Step 3: Set up for Recording
 The SingPlay recording page has four buttons at the bottom. The CD image (center button) button is to control playback and pause. The mic button (on the right) is to switch Karaoke mode on or off. The Karaoke mode is used to reduce the original vocals from the song. Since we are using a Karaoke music track for our recording, tap this button once to turn off the Karaoke mode. It should make the music sound louder and clearer.
 Now, tap Control button (above mic button) and a Control Panel will be displayed. Use it to adjust the tempo and pitch of the music track. Come back to the main page and listen to the music now. Repeat the steps till you reach a tempo and pitch which is comfortable for your singing.
 Connect a headphone or a hands free kit to your phone. This is because while singing, you want to hear the music in your earphone to ensure a clean recording of your vocals. Now, play the track and practice singing with it till you get it right.
You are ready to start recording now.
Step 4: Record Your Performance
 Tap REC button, recording will start after a short countdown, with the music track playing in your ear. Sing along the track.
It is better not to hold the phone in hand while recording, but keep on a table to avoid noise. Make sure you are in a quiet room, with not too much noise.
When you are done with singing the song, tap REC button to stop recording. You will get three buttons on the screen. If you are not happy with the performance, tap Cancel button, and do the recording again. When you are satisfied, tap Listen button to save and listen to the recording.
Step 5: Adjust the Mix

Music Volume – slide this control to adjust the volume of background music. If music sounds too loud or the vocals sound too soft, lower the music volume.
Vocal Volume - slide this control to adjust the volume of your vocals so that it sounds good with music.
Reverb Volume – slide this control to make your vocals sound more spacious. Its range is from 0-6, a value between 2 and 4 will give you good results.
Music Delay (Sync) – slide this control if you feel that the timing of music and vocals are not matching perfectly. If not sure, leave this setting unchanged.
After every change, listen to the mix again. It is easy to do, but the quality of the final mix depends on how carefully you listen to different sounds in the mix. Do it repeatedly till you get the recorded mix to right.
Step 6: Render the Mix as an Audio File

Finally, you are ready to render your performance. Tap the export button, and your recording will be saved in your music library. That’s it – you are done with your Karaoke performance recording and mixing. If you want to create a video for sharing on Youtube, tap the Share button and save the performance as a video in your photo album.
I will leave you with an example recording that I created using the above steps in SingPlay. Have fun recording your performance!
Read next post in the series - Novice in the Wonderland – Live Recordings at Sur Swaranjali
Music Series - My Experiences
If you are reading beyond this point, you are likely to be interested in finding out more about this topic. Some time back I wrote a series of posts on how I went about learning about digital recording process at home. You can read these posts here. These posts also include samples from the recordings I made on the way.4. Enchanting Engineers - A Musical Journey
5. My Recipe for Home Recordings
6. Tear-down of a Music Band Performance
7. from Audio to Music
8. A Recipe for Karaoke Recordings
9. Live Recordings at Sur Swaranjali
Excellent App. Sanjay Ji..wah
ReplyDeleteThanks a lot Rajesh bhai.
ReplyDelete